
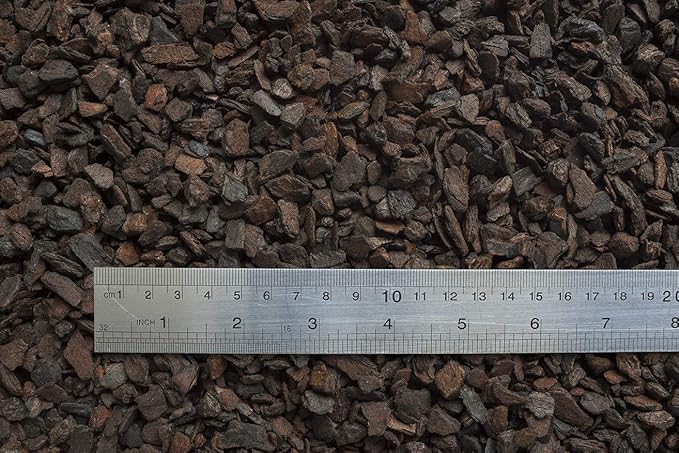
The right orchid soil mix fixes root rot faster than any watering trick. This is because healthy roots need air first, not just water.
Orchids fail quietly. Leaves soften and roots turn mushy. Growth slows down. Most people blame watering. But the real issue usually sits inside the pot. The mix breaks down, airflow disappears, and roots suffocate.
Orchids are not like regular houseplants. They do not grow in soil. In the wild, they cling to trees. Their roots breathe and they dry out. Then they get wet again. This cycle matters.
Fix the mix, and everything starts to improve. Roots recover and the leaves firm up. Blooms return.
Why Most Orchid Soil Mixes Fail and Cause Root Rot
Most orchid soil mixes look great at first. Then, slowly, things start to go wrong.
The issue often begins with the quality of the bark used in the mix. Orchid bark products can vary significantly in how they are sourced, processed, and aged. Lower-quality bark may break down relatively quickly, causing the potting medium to become denser over time.
As bark decomposes, the structure gradually changes. Air pockets become smaller, drainage slows, and the roots receive less oxygen. This shift creates conditions that can eventually contribute to root rot if the medium is not replaced.
What actually happens inside the pot
As the bark breaks down:
- The structure compacts
- Water stays longer than it should
- Airflow drops sharply
Now think about orchid roots. They are not like regular plant roots.
Orchid roots have a special outer layer called velamen. It acts like a sponge. It absorbs water quickly. But it also needs air to function.
When roots sit in constant moisture:
- The velamen stays waterlogged
- Oxygen cannot reach the root cells
- Cellular respiration slows down
In simple terms, the roots cannot breathe. Once that happens, the tissue weakens. Weak roots are easy targets for rot.
The hidden problem: changing root conditions
There is another issue many growers do not notice right away.
As lower-quality bark decomposes, the growing environment inside the pot changes. Reduced airflow, uneven moisture retention, and accumulated fertilizer residues can all place additional stress on orchid roots over time.
This creates two problems:
- Roots get “burned” by excess salts
- Water uptake becomes harder for the plant
The American Orchid Society notes that root rot often begins when roots are damaged by salt accumulation. So the damage is not just from water. It is also from what builds up in that water over time.
Why additives don’t solve the problem
To delay this breakdown, many mixes include:
- Charcoal
- Perlite
These materials help with drainage at the start. But they do not stop the bark from breaking down.
So what happens?
- The bark still collapses
- The mix still compacts
- The problem just takes a little longer to show
They are not upgrades. They are temporary fixes.
What this means for your orchid
After a few months, the mix behaves very differently from day one.
| Stage | What You See | What the Plant Feels |
| Fresh mix | Airy, drains fast | Healthy roots |
| 6 months | Slightly dense | Mild stress |
| 12 months | Compact, wet | Oxygen loss |
| Beyond | Soggy, broken down | Root rot risk |
What a Good Orchid Soil Mix Actually Needs
A strong orchid soil mix is not complicated. It just needs to stay consistent.
Here is what matters most:
- Airflow: Roots need oxygen at all times
- Moisture balance: Even moisture, not soggy or dry
- Structure: The mix should not collapse quickly
- Stability: It should behave the same week after week
If the mix changes too fast, the plant struggles to adapt. This stress shows up as weak roots, slow growth, and poor flowering.
A good mix removes guesswork. Watering becomes easier and growth becomes steady.
How to Tell If Your Orchid Has Root Rot
Root rot often starts below the surface. By the time it shows clearly, the plant is already stressed.
Still, there are early signs. Once you know what to look for, they are easy to spot.
1. Above-Soil Signs (What the Plant Is Telling You)
Start by looking at the leaves and flowers. They often show the first warning signals.
Common signs include:
- Leaves turning yellow without a clear reason
- Drooping leaves that stay limp even after watering
- Bud blast, where buds dry up and fall before opening
- Slow or completely stalled growth
These signs can feel confusing. The plant may look thirsty, but watering more does not help. That is usually a sign the roots are not working properly.
2. Check the Roots (The Most Reliable Test)
To be sure, the plant needs to come out of the pot. This step sounds scary, but it is the only way to know for sure.
Gently slide the orchid out. Then look closely at the roots.
Here is a simple comparison:
| Healthy Roots | Rotting Roots |
| Firm to the touch | Soft or mushy |
| Green when wet | Brown or black |
| Silvery when dry | Dark and dull |
| Plump and full | Hollow or collapsing |
Healthy roots feel strong. They hold their shape. Rotting roots feel weak. They may fall apart when touched.
If most roots look damaged, the plant is struggling to take in water and nutrients.
3. Use the Smell Test
This is a quick but powerful check. Healthy roots have almost no smell. At most, they have a light, earthy scent.
Rotting roots smell different. The odor is often:
- Sour
- Musty
- Similar to something decaying
If the smell is unpleasant, rot is already active.
When roots rot, the plant cannot absorb water. Even if the mix is wet, the plant behaves like it is dry.
That is why symptoms feel confusing.
- Water more → roots suffocate
- Water less → plant dehydrates
This cycle continues until the root system is fixed.
Step-by-Step Orchid Root Rescue & Repotting Guide (Fix Root Rot Fast)
If root rot has already started, quick action makes all the difference. Orchids can recover well, but only if the damaged roots are removed. The plant should be reset in a stable medium.
Follow this simple rescue sequence
- Remove the plant from the pot
Gently slide the orchid out. If roots are stuck, squeeze the pot sides or tap lightly. Avoid pulling hard. Healthy roots can tear easily. - Shake off the old mix
Loosen and remove as much of the old orchid soil mix as possible.If the mix is soggy or smells bad, that confirms breakdown and poor airflow. - Inspect every root carefully
This is the most important step. Look for:
- Healthy roots → firm, green (wet) or silver (dry)
- Dead roots → brown, black, soft, or hollow
- Sterilize your cutting tool
Use scissors or pruning shears. Wipe them with alcohol or flame-sterilize. This prevents spreading bacteria or fungus to healthy tissue. - Cut away all damaged roots
Trim back to firm, healthy sections only. It may feel harsh, but leaving rot behind will spread the problem again. - Let the cuts dry (very important)
Place the plant in a shaded, dry spot for 20 to 30 minutes. This helps seal the cut ends and lowers infection risk. - Repot in fresh, stable bark
Choose a medium that will not break down quickly. This is where Pinus radiata bark like Orchiata stands out.
What Orchiata does:
A. It holds structure for years, not months
B. It keeps air pockets open around roots
C. It does not need fillers like perlite or charcoal
- Place the orchid in the pot and gently fill around the roots. Do not pack too tight. Roots need space to breathe.
- Wait before watering
Hold off watering for 24 to 48 hours. This gives the cut roots time to heal and reduces the chance of infection.
The plant may look weak at first. That is normal. It just lost part of its root system. Over the next few weeks:
- New roots begin to form
- Leaves regain firmness
- Growth slowly returns
This is where the right medium proves its value. A stable bark like Orchiata creates a steady environment, so the plant does not face the same stress again.
7 Proven Orchid Soil Mix Fixes
1. Start with the Right Bark
Many standard orchid mixes use bark that varies in quality, processing, and longevity. As lower-quality bark decomposes, it gradually loses structure, reducing airflow around the roots and making moisture management more difficult.
Premium New Zealand Pinus radiata bark, such as Orchiata, is processed differently. The bark is carefully aged and graded to maintain its structure for much longer than many conventional bark products. Because it remains stable over time, air spaces stay open, drainage remains consistent, and orchid roots continue receiving the oxygen they need.
But the real difference is in how high-quality pine bark is prepared.
Aging vs. composting: why it matters
Not all orchid bark is processed the same way. Some bark products are composted or minimally processed, which can accelerate decomposition once they are in the pot. Premium orchid bark is intentionally aged under controlled conditions to stabilize the outer surface while preserving the strength of the inner structure.
Aged bark works differently. Only the outer layer is conditioned. The inner core stays firm and intact.
In simple terms:
- Composted bark → breaks down fully and quickly
- Aged bark → stays strong inside, functional outside
This is why structure lasts longer and keeps roots healthy.
pH balance: the hidden factor that growers miss
Raw pine bark is naturally acidic. Its pH can sit around 3.5 to 4.0. That is too low for orchids.
Over time, as bark breaks down, it becomes even more acidic. This leads to nutrient lockout. The plant cannot absorb what it needs, even if fertilizer is added.
Professional-grade pine bark is buffered during processing. This brings the pH into a usable range for orchids. This means that:
- Nutrients stay available
- Roots do not get stressed
- Growth stays consistent
Beneficial microbes: natural root protection
High-quality aged bark also supports helpful micro-organisms. Two important ones are:
- Penicillium
- Trichoderma
They protect the root zone. These microorganisms help by:
- Competing with harmful fungi
- Breaking down organic matter in a controlled way
- Supporting a healthier root environment
Think of them as a natural defense system living in the pot.
When all of this comes together, the result is a stable growing medium that works with the plant, not against it.
- Structure stays open
- Moisture stays balanced
- pH stays in range
- Roots stay protected
Professional-grade orchid bark such as Orchiata is produced from sustainably grown New Zealand Pinus radiata. It is carefully aged, pH balanced, and graded to provide a stable growing medium that maintains excellent structure and airflow over an extended period.
Unlike many conventional bark products that can vary from batch to batch, Orchiata is manufactured under controlled conditions to produce consistent particle sizes and reliable performance. This consistency helps growers maintain more predictable watering cycles and healthier root systems across a wide range of orchid varieties.
Once the roots stop fighting the medium, the plant can finally focus on growing and blooming again.
What Makes Orchiata Different (and Why It Matters for Root Health)
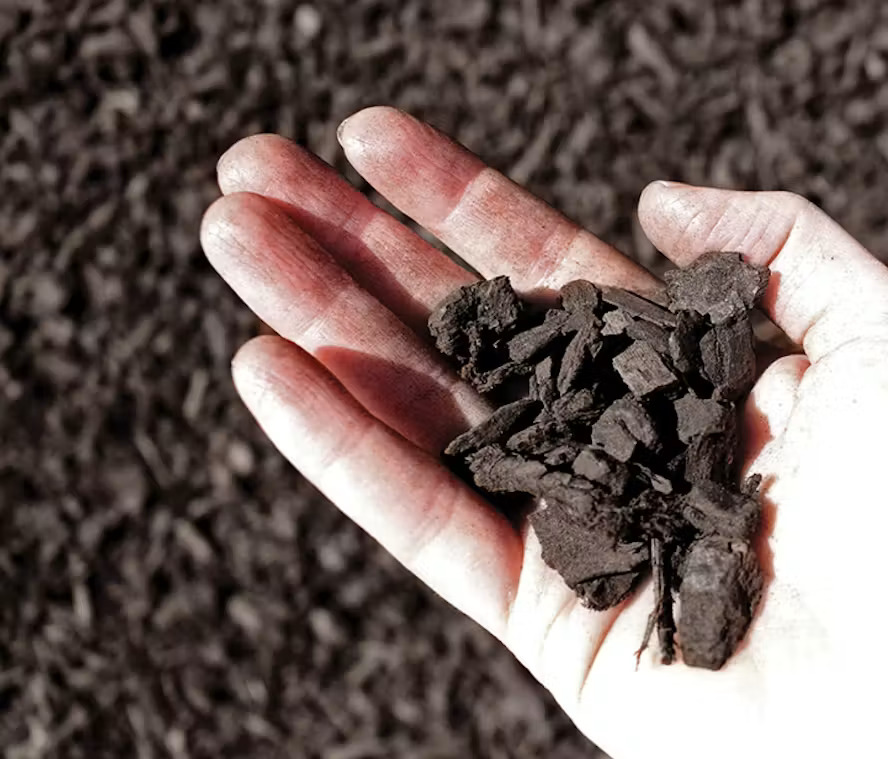
Not all orchid bark is created equal. Differences in tree species, harvesting methods, processing, and aging all influence how a growing medium performs over time.
Orchiata stands apart because it is produced from premium New Zealand Pinus radiata bark using a carefully controlled aging process. The result is a growing medium designed to provide long-lasting structure, balanced moisture retention, and consistent airflow for healthy orchid roots.
Here’s what you need to know about it.
1. pH is already balanced
Raw bark is naturally acidic. Over time, it becomes even more acidic as it breaks down. That creates problems like:
- Nutrients become unavailable
- Roots struggle to absorb what they need
- Growth slows down
Orchiata is pH balanced during production. This removes that instability from day one. So instead of chasing pH with additives later, the medium already starts in the right range.
2. Built-in protection from harmful pathogens
Healthy roots are not just about water and air. They also depend on what is happening at a microscopic level. Orchiata contains beneficial micro-organisms like:
- Penicillium
- Trichoderma
These are naturally present and intentionally preserved. They help by:
- Competing with harmful fungi
- Reducing the risk of root disease
- Supporting a healthier root zone
So the medium is not just passive. It actively supports root health.
3. No salt buildup over time
Salt accumulation can become a problem in any orchid potting medium if fertilizer is applied heavily or the medium is not flushed periodically. A stable bark structure promotes more even water movement through the pot, helping growers maintain a healthier root environment with proper watering and fertilization practices.
Because Orchiata maintains its structure for an extended period, it supports consistent drainage and airflow, making long-term root care easier when combined with good growing practices.
That means:
- Less need for flushing
- More stable feeding routines
- Lower long-term stress on roots
4. Aged, not composted
This is one of the most important differences, yet often overlooked.
- Composted bark breaks down fully. Structure weakens quickly.
- Aged bark only changes on the surface. The inner core stays strong.
Orchiata uses an aging process, not composting.
What that does:
- Outer layer holds water and nutrients
- Inner core stays hard and stable
- Air spaces remain open for longer
So the plant gets both moisture and airflow at the same time. This balance is hard to achieve with standard mixes.
5. Ready to use straight from the bag
Some orchid bark products benefit from soaking before use, depending on how they are processed and packaged.
Orchiata is different.
- It is clean
- It has low dust
- It has no harmful buildup
So it can be used directly from the bag. There is also a hidden reason not to wash it. The light coating sometimes seen on the bark is beneficial. Washing removes that layer and reduces its value.
6. Holds structure for years, not months
Most mixes start strong and then collapse. Orchiata is designed to do the opposite:
- Stay open
- Stay stable
- Maintain a consistent wet-dry cycle
This reduces the need for frequent repotting. More importantly, it gives the roots a steady environment over time.
Quick comparison
| Feature | Typical Bark Mix | Orchiata |
| pH stability | Drops over time | Balanced from start |
| Microbial support | None | Beneficial organisms present |
| Salt buildup | Common | Minimal to none |
| Processing | Composted | Aged |
| Prep before use | Often needed | Ready to use |
| Longevity | Short | Long-lasting |
2. Match the Chip Size to the Orchid Type
Orchid roots are not all the same. Some are thin and delicate. Others are thick and fast-growing. So the bark size must match the root type and water needs.
A simple rule helps:
- Smaller roots need smaller chips
- Plants that like more moisture need smaller chips
- Thick roots need larger chips
Orchid Type vs Bark Size (Practical Guide)
| Orchid Type | Root Type | Best Bark Size | Why It Works |
| Phalaenopsis | Medium, fleshy | Medium | Holds moisture but still drains well |
| Cattleya | Thick, chunky | Large | Dries faster, prevents root rot |
| Dendrobium | Thick, fast-growing | Large | Needs airflow and quick drying |
| Oncidium | Fine to medium | Medium | Balanced moisture for active roots |
| Paphiopedilum | Fine, sensitive | Small | Holds steady moisture, avoids drying |
| Vanda | Very thick, airy | Extra large | Maximum airflow, very fast drying |
| Mini orchids | Very small | Small | Keeps roots evenly moist |
Why chip size matters
Smaller chips have more surface area. That means they hold more water. Larger chips have less surface area, so they dry faster and allow more air.
If the size is wrong, following can happen:
- Too small for thick roots
The mix stays wet for too long. Roots cannot breathe. Rot starts. - Too large for fine roots
Water drains too fast. Roots dry out. Growth slows.
How Orchiata sizes match real orchids
Orchiata has multiple bark grades. Instead of guessing, the size is already designed for specific plant types.
| Grade | Chip Size | Best For |
| Precision | 3–6mm (⅛”–¼”) | Seedlings, flask plants, orchids in 3–5cm pots |
| Classic | 6–9mm (¼”–⅜”) | Young orchids, second potting, small-rooted types (Paphiopedilum) |
| Power | 9–12mm (⅜”–½”) | Young to mature orchids, Phalaenopsis, Oncidium |
| Power+ | 12–18mm (½”–¾”) | Mature orchids, Cattleya, Dendrobium, larger pots |
| Super | 18–25mm (¾”–1″) | Mature orchids needing maximum drainage (Vanda) |
3. Stop Relying on Perlite and Charcoal
Many people assume that perlite and charcoal improve performance. They do not solve the real problem.
They are added because the base bark breaks down. Once the bark starts failing, airflow drops. These materials try to keep the mix open. But they do not stop decomposition.
- Perlite adds temporary air space
- Charcoal has limited impact on structure
Over time, the mix still compacts. A stronger approach is to use a base material that does not break down quickly. When the foundation is stable, extra fillers become unnecessary.
4. Use a Medium That Stays Stable Over Time
Most mixes change within a few months. This is the hidden issue.
At first, watering feels easy. Then the mix starts holding more water. It stays wet too long. The plant has to adjust again and again.
That cycle creates stress. A stable medium behaves the same over time. It drains the same way. It dries at a similar pace. Roots can adapt once and stay comfortable.
This is where processed pine bark stands out. Its structure stays intact. Its surface holds moisture without becoming soggy. Air pockets remain open.
That consistency helps roots focus on growth instead of survival. In bark products like Orchiata, the surface is already conditioned. So, there is no need for soaking or pre-treatment before potting.
5. Avoid Overwatering by Fixing the Mix (Not the Schedule)
Many people try to fix root rot by changing how often they water. Water less. Then water more. Then wait longer. The problem is not the schedule. It is the mix.
If the mix holds water unevenly, no schedule will fix it. Some parts stay wet. Others dry out. Roots suffer either way.
A well-structured mix solves this.
- Water drains evenly
- Moisture spreads consistently
- Roots get both air and water
Once the mix is right, watering becomes simple. Check the pot. Feel the weight. Water when needed.
6. Stop Repotting Too Often
Repotting sounds helpful. But too much of it creates stress.
Each time roots are disturbed, the plant pauses. It needs time to recover. Growth slows down.
Why do people repot so often? Because the mix breaks down. Bark that decomposes quickly often requires more frequent repotting because it gradually loses the open structure orchid roots depend on. Choosing a durable, high-quality bark can extend the time between repotting while maintaining a healthier root environment.
A more durable bark lasts longer. Often two to three times longer. That means fewer disruptions.
Roots stay settled and the plant stays stable. Stability leads to better growth and stronger blooms.
7. Use a Medium That’s Ready to Go
Many growers are told to soak or rinse bark before using it. That advice comes from dealing with low-quality materials.
When bark is inconsistent, soaking tries to even things out. But it also adds another variable.
- How long to soak?
- How much water to remove?
- Is it too wet or too dry?
A ready-to-use medium removes that step. High-quality bark comes prepared. The surface is already conditioned. Moisture behavior is predictable from the start.
That saves time. It also reduces mistakes.
Simple Orchid Soil Mix That Works (Beginner-Friendly Setup)
Most orchids do not need complicated mixes.
Option 1:
- 100% high-quality bark
This works for most home growers. It provides airflow, stability, and predictable watering.
Option 2:
- Bark with a small amount of moss
This helps in very dry homes or for specific orchids. But it needs careful handling.
Common Orchid Soil Mix Mistakes to Avoid
Watch out for these:
- Using regular potting soil
- Choosing the wrong bark size
- Mixing too many materials
- Ignoring how the mix changes over time
- Packing the pot too tightly
Each of these reduces airflow, which is crucial for orchid roots.
How to Know Your Orchid Soil Mix Is Working
A healthy mix shows clear signs. Look at the roots first.
- Green when wet
- Silvery when dry
That shift is normal. It shows the roots are active. Other signs include:
- Firm leaves
- Steady growth
- Predictable drying cycle
The plant should not look stressed between waterings. It should settle into a rhythm. That rhythm comes from a stable root environment.
Final Thoughts: Fix the Mix, Fix the Orchid
Orchids are often called difficult. In reality, they respond to their environment. When roots get air, balance, and stability, the plant follows through.
Most problems trace back to one thing. The mix breaks down, and the roots lose support. Fix that, and the rest becomes much easier.
FAQs
1. Can orchids recover from root rot?
Yes, orchids can recover if the damage is caught early. The key step is removing all soft, brown, or mushy roots. Healthy roots must remain. After that, repot in a fresh, airy bark mix. With stable care, new roots usually grow back. Recovery depends on how much healthy root is left.
2. How long does it take an orchid to recover from root rot?
Recovery takes time and patience. Most orchids start showing new root growth in about 3 to 6 weeks. Full recovery can take a few months. During this time, avoid overwatering. Keep the plant in a stable environment. Healthy roots need time to rebuild before strong leaf or spike growth returns.
3. Should I water an orchid after repotting for root rot?
It is best to wait before watering. After trimming roots, let the plant sit dry for 24 to 48 hours. This helps the cut ends seal. Watering too soon can invite rot again. Once you start watering, keep it light. Let the bark dry slightly between waterings to protect new roots.
4. What is the best orchid bark to prevent root rot?
The best orchid bark is one that provides excellent airflow, balanced moisture retention, and long-lasting structure. Premium New Zealand Pinus radiata bark, such as Orchiata, is valued by many orchid growers because its controlled aging process helps it remain stable over time, supporting healthy root growth and reducing the need for frequent repotting.
5. Do I need to sterilise tools when removing rotted roots?
Yes, always sterilise tools before cutting roots. Dirty scissors can spread bacteria or fungus to healthy parts of the plant. Use rubbing alcohol or heat to clean the blades. This step may seem small, but it protects the plant during a sensitive stage and improves recovery success.
6. What pH should orchid bark be?
Orchid bark should be slightly acidic. A pH range of about 5.5 to 6.5 works best. This range helps the plant absorb nutrients properly. If the bark becomes too acidic over time, nutrients get locked out. That can slow growth and weaken roots. Stable pH keeps the plant healthy.
7. How long does Orchiata last before repotting?
Orchiata usually lasts much longer than standard bark. It can stay stable for about 2 to 3 years in the pot. This is because it is made from dense Pinus radiata bark that resists breaking down. Since it holds structure longer, repotting is needed less often compared to typical bark mixes.