
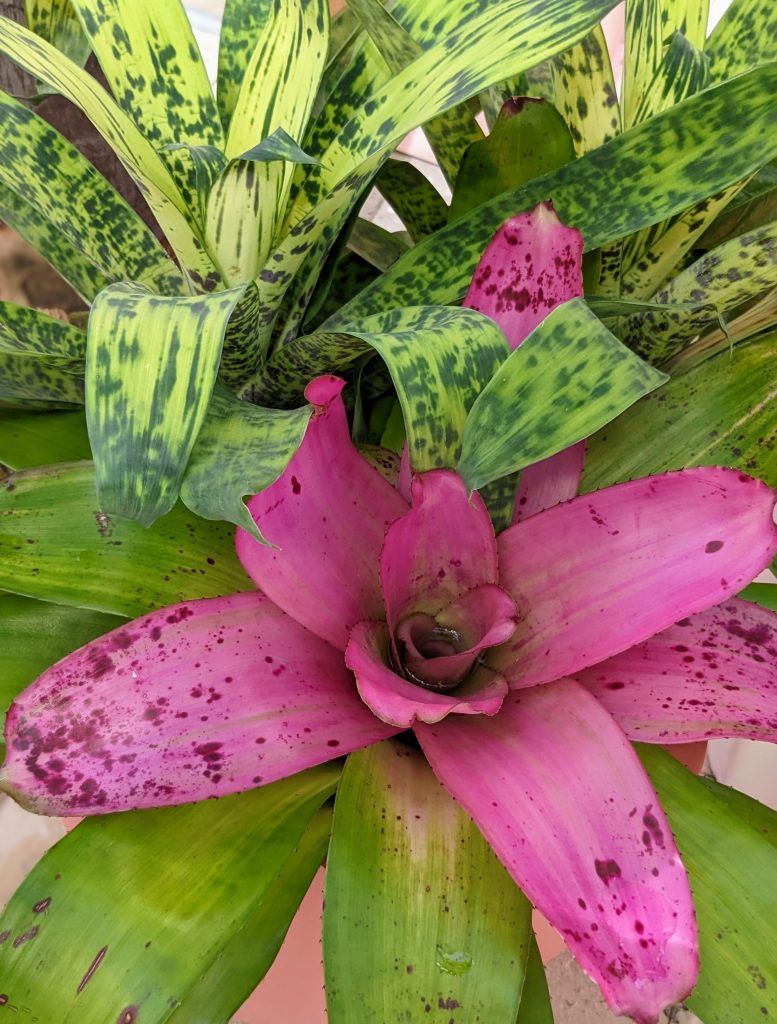
Bromeliads need bright, indirect light, water in their central cup, and a fast-draining mix. They bloom once, then produce pups that carry the plant forward.
How Do You Take Care of a Potted Bromeliad?
Bromeliad care starts with understanding that most bromeliads are epiphytes. Their roots exist mainly to anchor the plant, not to feed it. Water and nutrients come mostly through the central cup and the leaves themselves.
Light
Bromeliads generally prefer sun over deep shade. Bright, indirect light suits most varieties best. Guzmania and Vriesea tolerate lower light levels than most. Aechmea and Neoregelia need brighter, indirect light to hold their color. Direct, harsh sunlight can scorch the foliage and cause sunburn. A spot near an east- or west-facing window usually works well indoors.
Water
The rules for Bromeliad care watering center on the central cup. Keep that cup filled with fresh water at all times. Flush it out every few days to a week, especially indoors. This prevents bacterial buildup. Use rainwater, filtered water, or distilled water when possible.
Hard tap water leaves mineral deposits that can brown the foliage over time. Water the growing medium itself every one to two weeks during the growing season. Water it every two to three weeks during fall and winter dormancy. Always let excess water drain fully from the pot.
Humidity and Temperature
Bromeliads thrive in high humidity. So, bathrooms and kitchens are good spots for them. Average room temperatures suit most varieties well. Keep plants away from heating and cooling vents, since the dry air can brown leaf tips quickly.
Soil and Repotting
Bromeliads need a light, fast-draining mix. A common method combines potting soil with orchid bark in equal parts. These plants aren’t drawing nutrients from the soil the way most houseplants do. So, the mix mainly needs to support the plant and let excess water pass through fast.
Orchiata orchid bark works well for this purpose. Made from aged New Zealand pine bark, it creates the loose, chunky structure bromeliad roots need. Standard bark composts down and turns dense within a season. But Orchiata holds its shape far longer. It lets the mix stays open and well-draining through repeated waterings. Some growers top the pot with a layer of bark after planting. They do this both for the look and for a bit of extra air circulation around the base.
Fertilizing
Bromeliads are light feeders. A diluted liquid fertilizer applied every few weeks during the growing season supports healthy growth. Avoid feeding heavily. These plants can survive on minimal nutrients from rainfall and debris.
Separating Bromeliad Pups
Bromeliads produce baby plants, called pups. The mother plant produces them before she dies. Removing and potting these pups keeps your collection growing for years. Wait until a pup reaches a good size, ideally at least 6 inches tall. There should be some visible root development. Bigger pups have more root mass and adjust faster to life on their own.
- Grip the pup firmly at its base while holding the mother plant steady. Then pull it away. Use a clean, sharp knife to cut the pup free at the base.
- Fill a new pot with a mix of half potting soil and half orchid bark. This keeps the medium from staying too wet.
- Position the pup in the pot, using its naturally flat side to face the center if there’s more than one.
- Press the mix in gently around the base. Do not bury the pup too deep. It raises the risk of rot.
- Water the mix thoroughly right after potting. Fill the central cup as well.
- Place the newly potted pup somewhere with bright, filtered light. It should be protected from harsh afternoon sun and strong wind.
Keep in mind that bromeliad pups typically won’t flower for another three to six years.
What Are Common Bromeliad Problems?
A Dying or Struggling Bromeliad
A bromeliad that looks unwell can recover with an environmental adjustment. Check that it’s getting bright, indirect light, ideally near an east- or west-facing window. Direct sun scorches the foliage. But too little light produces dark, elongated leaves with faded color.
Yellowing Leaves
Yellow or pale foliage signals a need for fertilizer. Elongated, dark green leaves with little color usually point to insufficient light instead. Moving the plant to a brighter spot. Alternatively, supplement with LED or fluorescent light for 8 to 10 hours daily.
Overwatering and Water Quality Issues
Soft, overly yellow foliage often signals overwatering. Repot into fresh, dry medium and hold off on watering for a few days. If the leaves are browning, mineral buildup from hard water may be the cause. Switch to filtered, distilled, or rainwater..
Pests
Outdoor bromeliads occasionally attract mosquitoes and aphids. Mosquitoes can breed in the standing water inside the cup. Thus, refresh it regularly. Aphids tend to target the base of the plant and roots, causing stippled leaves.
A strong spray from a garden hose, or a mild neem oil application clears them. Scale appears as small, raised brown ovals. They can be removed with a rubbing-alcohol-dipped cotton swab, followed by a thorough rinse. Mealybugs, similar in appearance but fuzzier, respond to the same treatment.
Crown Rot and Root Rot
A stinky, mushy center is a clear sign of crown rot, usually caused by improper watering. Bromeliads are also prone to root rot given their shallow root systems. Using a clean, fast-draining mix and a pot with proper drainage helps prevent both issues from developing.
Rust and Leaf Spot
Rust disease manifests as brown-red lumps on the underside of leaves. They are a result of overwatering with poor air circulation. Let the plant dry out between waterings.
Leaf spot, another fungal problem results from overhead watering. It appears as sunken brown spots of varying sizes. Remove infected leaves and dispose of them to stop the spread.
How to Get Your Bromeliad to Flower?
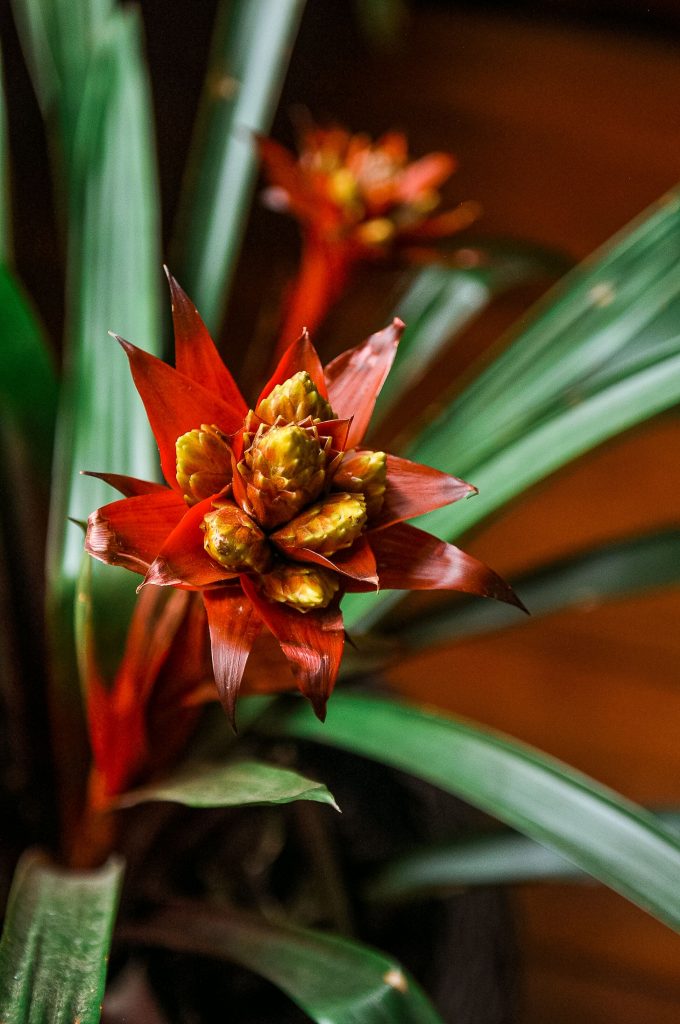
A mature bromeliad that’s already bloomed won’t flower again. Reblooming the same plant isn’t possible. This is because bromeliads grow in a rosette. It stops adding new leaves once it flowers. All future blooms come from the pups it produces at the base.
Getting Pups to Bloom
Once you’ve separated and potted a pup, keep the central cup filled with water. Feed the pup with diluted liquid seaweed or compost tea every two weeks. This encourages steady growth toward maturity.
Speeding Up the Process
To expedite blooming, add a small amount of dissolved Epsom salt to the cup once a month. It can assist chlorophyll and bloom generation.
Some people use ethylene gas. Here’s how to use it.
- Drain the central cup of the plant.
- Put the entire plant inside a big plastic bag.
- Then, put a slice of kiwi, banana, or apple inside the bag as well.
- Close the bag and leave it for 10 days.
- The fruit slice gives off in the air ethylene as it ripens. This stimulates blooming.
- Take out the plant from the bag and the plant blooms within six to ten weeks.
What Is the Lifespan of a Bromeliad?
A bromeliad’s lifespan typically runs 2 to 5 years. But it varies by species and growing conditions. It generally takes 2 to 5 years for a plant to mature enough to produce its one and only flower. Once that bloom fades, the mother plant begins a slow decline. But it does not die before pups have already started forming at its base.
Bromeliad pups themselves take roughly 3 years to bloom after being separated from the mother. Through this cycle of blooming, producing pups, and passing the torch, a bromeliad lineage can continue in your home or garden indefinitely.
Bromeliad Care After Flowering
Understanding the Flower Spike
Bromeliad “flower” is technically the whole flower spike. The individual flowers are small and white, appearing along that spike. Once blooming finishes, the spike gradually fades. Them it shifts to a greenish or brownish hue over several weeks.
Bromeliad flower spikes generally stay attractive for about two to four months. Then fading begins. They can take another one to two months to fully decline.
When and How to Prune the Spike
Cutting off the fading spike comes down to personal preference. Some growers leave it as long as possible. Others prefer to remove it as soon as the color starts to shift. If you do choose to prune, cut the entire spike down to where it emerges from the cup. Use clean, sharp shears or a knife. Removing just the flower head and leaving a stub looks awkward.
Continued Care for the Mother Plant
Continue caring for the plant the same way you did while it was blooming. Keep it in bright, indirect light. It also supports the pups now growing at its base. Keep the central cup roughly one-quarter full of water. Flush it out monthly to prevent bacterial buildup.
Water the growing medium about once a month. Let the excess water drain completely. Overly wet medium during this stage can lead to root rot. Use filtered, distilled, or rainwater to avoid mineral buildup from tap water.
What Happens Next
The mother plant will not produce new flowers. Its decline is a natural part of the bromeliad life cycle. Meanwhile, the pups at its base carry the plant’s lineage forward.
One Bloom, Many Chapters
A bromeliad’s story doesn’t end with its single flower. That bloom is really just the middle chapter. It arrives after years of steady growth. Understanding this cycle changes how you think about the plant entirely. A fading flower spike isn’t a failure to fix. It’s a signal that new growth is already underway at the base. Learn to read your bromeliad’s cup, its light, and its pups, and you’ll find yourself growing the same lineage for years.
FAQs
Do bromeliads only flower once?
Yes, a mature bromeliad blooms exactly once in its lifetime. After that single bloom fades, the mother plant gradually declines. It produces pups before or during this process, and those offsets will eventually mature and flower on their own, continuing the plant’s lineage.
Do bromeliads like shade or sun?
Most bromeliads prefer bright, indirect light over deep shade or harsh direct sun. Some varieties, like Guzmania and Vriesea, tolerate lower light better than others. Aechmea and Neoregelia need brighter conditions to hold their color. Direct sunlight can scorch the foliage and cause sunburn.
Is bromeliad high maintenance?
No, bromeliads are generally low maintenance once you understand their basic needs. They tolerate infrequent watering of the soil, adapt to a range of light conditions, and rarely suffer from serious pest problems. The main habit to build is keeping their central cup filled with clean water.
Where is the best place to put a bromeliad?
A spot with bright, indirect light works best, such as near an east- or west-facing window. Bathrooms and kitchens often suit bromeliads well due to their naturally higher humidity. Avoid placing them near heating or cooling vents, which can dry and brown the foliage.
How many times should I water a bromeliad?
Water the growing medium every one to two weeks during spring and summer, and every two to three weeks during fall and winter. Keep the central cup filled with fresh water at all times, flushing it out every few days to a week to prevent bacterial buildup.