
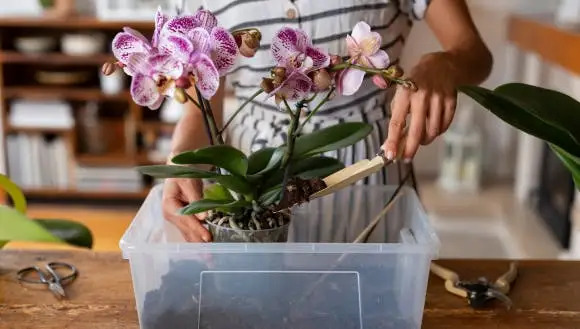
Your orchid’s roots can almost certainly be saved, even when things look genuinely alarming. That’s the most important thing to know before you decide the plant is beyond help. Orchid rotting roots are one of the most common problems growers encounter, and they’re also one of the most fixable when you know what you’re looking at and act before the rot spreads to the crown.
Most growers notice something is wrong above the soil long before they think to check what’s happening below it. Yellowing leaves. A limp quality to the plant that wasn’t there last week. Leaves that feel less turgid when you gently squeeze them. These above-ground signals are the plant telling you something about its roots, and understanding what each symptom means changes how quickly you respond.
This guide covers the full picture: what above-ground symptoms are telling you about root health, how to identify whether you’re overwatering, how to read every root color before you cut, the seven-step rescue protocol, and how to care for the plant during recovery. We’ll also cover which potting medium puts your orchid most at risk and why. Acadian Supply offers Orchiata, a premium New Zealand orchid bark that provides aeration and drainage. Understanding how bark quality affects the growing environment can help you choose a suitable medium for your orchid.
What Above-Ground Symptoms Tell You About Plant Root Health
Orchid roots and orchid leaves are in constant conversation. When the roots are struggling, the leaves show it. The problem is that many growers see yellowing leaves and think it’s a light problem, or a temperature problem, or that the plant is just finishing a bloom cycle. Sometimes it is. But when yellowing is combined with limpness or a wobble in the pot, the answer is almost always below the surface.
| Above-Ground Symptom | What It Often Indicates Below | Urgency |
| Yellow leaves, bottom first | Root loss reducing nutrient uptake | Check roots within a day or two |
| Limp or wrinkled leaves | Root damage reducing water absorption | Check roots today |
| Leaves yellowing all at once | Severe root rot, multiple roots affected | Check roots immediately |
| Mushy or soft leaf base | Crown rot, possibly extending from roots | Act today, very serious |
| Plant wobbles in pot | Root system has lost structural integrity | Unpot and inspect immediately |
| Wilting after watering | Roots too damaged to absorb water at all | Critical, act now |
The wilting-after-watering entry is the one that most confuses growers who haven’t encountered it before. It seems backwards. You watered the plant and it got worse? The explanation is that the roots have been so damaged by rot that they can no longer absorb moisture, even when it’s available. The plant is essentially in drought despite sitting in a damp medium. This is when root rot has progressed significantly and immediate intervention is required.
The mushy or soft leaf base is a more serious symptom because it suggests rot may have moved up from the roots into the crown, the central growing point of the plant. Crown rot is harder to reverse than root rot. If you notice softness at the base of the leaves where they meet the stem, treat this as a critical situation rather than a wait-and-see one.
Are You Overwatering? The 5-Question Checklist
Overwatering is the primary cause of orchid root rot, but it’s worth knowing that overwatering doesn’t just mean watering too often. It means creating consistently wet conditions around the roots, and that can happen through watering frequency, poor drainage, broken-down medium, or saucers that hold standing water. Work through these five questions honestly before you reach for the rescue tools.
| Question | Yes Answer Means |
| Does the medium still feel damp when you go to water? | You’re watering before the plant needs it |
| Does water drain slowly or pool on top of the medium? | Compacted medium, roots can’t breathe |
| Is the pot sitting in a tray with standing water? | Roots are constantly wet from below |
| Have you watered more than once a week consistently? | Likely too often for most indoor conditions |
| Has the plant been in the same medium for 2+ years? | Medium may have broken down and started holding moisture |
If you answered yes to three or more of these, overwatering is almost certainly contributing to whatever root problems you’re seeing. If you answered yes to question five, the medium breakdown issue is particularly important. A bark mix that’s been in the pot for two years or more often looks fine from the outside but has compacted internally into a moisture-holding mass that creates permanently damp conditions around the roots. This is a slow-motion root rot setup that doesn’t announce itself until the damage is visible.
Symptoms of Rotting Orchid Roots: The Root Color Guide
Before you cut a single root, you need to know what you’re actually looking at. Cutting healthy roots in a panic makes the rescue harder, not easier. The color and texture of an orchid root together tell you almost everything about whether it’s alive, damaged, or beyond saving.
| Root Colour | What It Means | Action |
| Bright green | Healthy and recently watered | Nothing needed |
| Silver / grey | Healthy but dry, ready to water | Water thoroughly |
| White | Air roots or very dry but still alive | Monitor, water if leaves wrinkle |
| Light brown, firm | Possibly dormant, may still be healthy | Squeeze test: firm = keep, soft = cut |
| Dark brown, soft | Root rot beginning, fungi or bacterial damage | Trim to healthy tissue, treat immediately |
| Black, mushy | Dead, no recovery for this root | Remove entirely, sterilise tools between cuts |
| Purple / violet tips | Early overwatering stress signal | Reduce watering frequency now, roots still alive |
The purple or violet tip entry matters more than most growers realise because it’s the earliest visible signal. Purple-tipped roots are not dead. They’re stressed. The roots are still functional but they’re telling you that moisture levels have been too high for too long. Catching this signal and adjusting watering before the tips turn brown is how you avoid root rot entirely. If you see purple tips and continue watering at the same rate, brown follows within weeks, and then black.
The light brown but firm entry trips people up because not all brown roots are dead. A firm root with a light brown exterior may simply be dormant or slightly dehydrated. Always do the squeeze test before cutting. If the root has structural resistance and doesn’t collapse under gentle pressure, it may still be contributing to the plant. If it collapses with no resistance, it goes.
The 7-Step Orchid Root Rot Rescue
Work through these in order. The temptation when you’re worried about a plant is to move quickly. Resist it. Clear decisions made slowly produce better outcomes than fast decisions made with incomplete information.
| Step | Action | Tool / Material |
| 1 | Remove plant gently from pot | Squeeze plastic pot sides, never pull by leaves or stem |
| 2 | Rinse all old medium from roots in lukewarm water | Basin of warm water, gentle separation |
| 3 | Assess every root using the colour guide above | Good light, clean dry surface |
| 4 | Cut all brown and black roots to healthy tissue | Sterile scissors, sterilize with alcohol between each cut |
| 5 | Treat cut ends with cinnamon or hydrogen peroxide | Ground cinnamon (preferred) or 3% H2O2 |
| 6 | Allow roots to air dry for 1 to 4 hours | Clean surface, good airflow |
| 7 | Repot in fresh, well-draining bark medium | Orchiata bark, clean pot with drainage holes |
Step 1: Remove the Plant from Its Pot
Gently squeeze the sides of a plastic nursery pot to loosen the medium before lifting the plant out. Never grab the orchid by its leaves or stem and pull. For ceramic or rigid pots, run a chopstick or thin implement around the inside edge to free the root ball. Lay the plant on a clean, well-lit surface where you can see what you’re working with clearly.
Step 2: Rinse All Old Medium from the Roots
Hold the root ball in a basin of lukewarm water and gently separate roots from old bark and moss. Old compacted medium sticking to roots makes it nearly impossible to assess them accurately. Cold water stresses orchid roots, so keep the water warm throughout. Take the time to get every root visible before you start making decisions.
Step 3: Assess Every Root
With the roots clean and fully visible, go through each one using the colour guide above. Firm green, silver, or white roots stay. Soft brown or black roots go. For borderline cases, the squeeze test decides: firm resistance means keep, no resistance means cut. Sort roots into clear and ambiguous before you pick up the scissors.
Step 4: Cut All Rotted Roots to Healthy Tissue
Sterilise your scissors or blade in 70% isopropyl alcohol before you start and between each cut. You’re cutting infected tissue and cross-contamination from one root to the next is a real risk. Cut back to the point where the internal root tissue is firm and white or light-coloured. If a root is brown all the way to its attachment point at the base, remove it completely.
Step 5: Treat the Cut Ends
Every cut surface is an open wound that needs antifungal protection before the plant goes back into any medium. Ground cinnamon is the most widely recommended natural option because it contains cinnamaldehyde, which inhibits fungal growth without damaging remaining healthy root tissue. Dust it directly onto every cut surface. As an alternative, dip cut ends in 3% hydrogen peroxide for thirty seconds and allow to dry completely before proceeding.
Step 6: Let the Roots Air Dry
Place the plant on a clean, dry surface with good air circulation for one to four hours. This allows cut ends to be callous slightly and reduces the moisture available to any remaining fungal spores. Potting a plant with wet cut surfaces directly into fresh medium is an invitation for a second round of rot to begin almost immediately.
Step 7: Repot in Fresh Premium Bark
The substrate you choose here determines whether the rescue holds long-term. Repotting into a cheap bark that will break down within a year means you’re rebuilding the same moisture-trapping conditions that caused the original rot. Orchiata premium New Zealand pine bark maintains its structure and aeration for two to three times longer than standard orchid bark mixes, which means the medium stays well-draining long after a cheaper product would have compacted.
Use a clean pot with drainage holes. If reusing the same container, wash it thoroughly and soak in a 10% bleach solution for ten minutes, then rinse completely. Fungal spores from the previous rot can survive in the pot and reinfect fresh medium.
Natural vs Chemical Treatments: What to Use and When
Most growers, particularly hobbyists encountering root rot for the first time, start with natural treatments and that’s generally the right approach. Natural options like cinnamon and hydrogen peroxide handle the majority of common root rot cases effectively and without risk of damaging remaining healthy tissue. Chemical fungicides are more appropriate when the infection is severe, recurring, or clearly caused by a specific pathogen.
| Treatment | Type | How to Use | Best For | Notes |
| Ground cinnamon | Natural | Dust directly on cut root ends | All root rot cases after trimming | Gentle, antifungal, widely recommended |
| 3% Hydrogen peroxide | Natural | Dip cut ends for 30 sec, air dry | Light to moderate rot | Can stress very thin remaining roots |
| Neem oil solution | Natural | Dilute, apply to medium and roots | Prevention + mild infection | Antifungal and antibacterial properties |
| Copper sulfate + lime | Chemical | Apply per product label to medium | Moderate to severe Phytophthora | AOS-recommended for serious infections |
| Metalaxyl / Mefenoxam | Chemical | Apply as drench per label instructions | Severe Pythium infection | Systemic, use when natural options fail |
| Captan or Mancozeb | Chemical | Spray or drench per label | Broad-spectrum fungal coverage | Alternate active ingredients to prevent resistance |
The copper sulfate plus lime combination is worth knowing about specifically because it’s recommended by the American Orchid Society for Phytophthora infections, which tend to spread faster and be more destructive than Pythium. If you’ve had multiple plants show root rot symptoms around the same time, or if the rot spreads unusually quickly despite treatment, a chemical drench applied carefully per product instructions may be warranted.
For the vast majority of cases, start with cinnamon on cut ends, repot into a clean medium, and adjust your watering schedule. That handles most root rot without needing anything else.
Which Potting Medium Causes Root Rot Fastest?
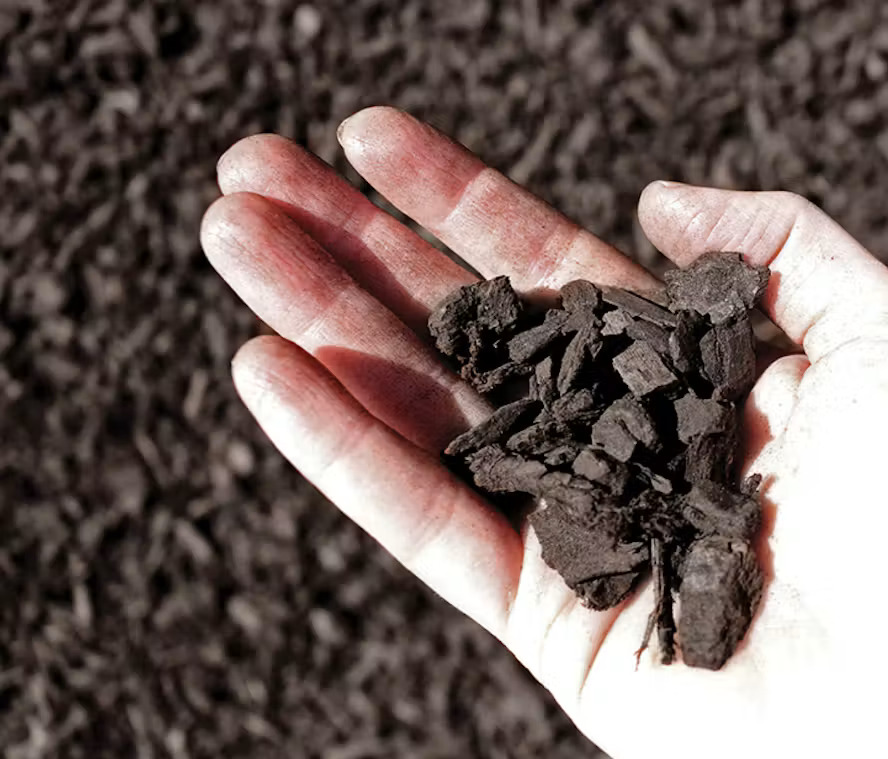
Substrate quality is the underappreciated side of root rot prevention. Growers spend time adjusting watering schedules while continuing to use a medium that compounds the problem by holding moisture as it breaks down. Understanding how different substrates behave over time changes how you think about repotting intervals and product choice.
| Substrate | Drainage | Typical Pot Life | Rot Risk | Notes |
| Orchiata pine bark (NZ) | Excellent | 2 to 3 years+ | Low | Maintains structure, stays aerated, slow to degrade |
| Generic orchid fir bark mix | Good at first | 6 to 12 months | Moderate | Breaks down quickly, compacts and holds moisture |
| Big box orchid mix | Variable | Under 12 months | High | Typically fir bark contains fine particles that compact fast |
| Pure sphagnum moss | Good | 12 to 18 months | Moderate | Holds moisture by design, good for some genera |
| Bark and moss mix | Good | 12 to 18 months | Low-Mod | Better than pure bark or moss alone for most orchids |
| Bark fines / decomposed | Poor | Already broken down | Very high | If medium resembles soil, repot immediately |
The big box orchid mix row is worth sitting with for a moment. These products are sold in grocery stores and garden centres in attractive branded packaging, and they’re the first thing most new orchid owners reach for. They work reasonably well for the first few months. But the particle size is often inconsistent, the bark is frequently not fully cured, and the fine particles compact quickly, creating a moisture-holding layer around the roots that the plant never had in nature.
Orchiata New Zealand pine bark maintains its structure because of how it’s processed and the specific timber species used. The consistent particle size stays aerated. Roots have the air circulation they evolved for. And you don’t face the compaction-driven root rot that many growers experience when they’re watering correctly but using a medium that’s quietly working against them. Find it through Acadian Supply’s retail network.
What to Do When There Are No Healthy Roots Left
This is the question most rescue guides avoid, and it’s the one the most anxious growers need answered. You’ve assessed, you’ve cut, and there’s nothing left that passes the squeeze test. What now?
| What You Have | What to Try | Success Likelihood |
| A few firm, pale roots | Standard 7-step rescue, repot in fresh bark | Good, 60 to 80% |
| 1 to 2 roots, rest gone | Rescue + high humidity, minimal watering | Moderate, 40 to 60% |
| No roots, firm green crown | Semi-hydro method, controlled humidity | Possible with patience |
| No roots, crown soft or brown | Keiki paste on firm node if available | Low but worth attempting |
| No roots, no firm tissue | Humidity tent, last resort | Very unlikely |
The semi-hydro method for completely rootless plants deserves a specific note. The orchid is placed with its base in a small amount of clean water in an enclosed high-humidity environment, not submerged but close enough that evaporation maintains constant humidity around the base. New root initiation can happen from the base of the plant even without any existing roots. It’s a months-long commitment but experienced growers have successfully used this method to recover completely rootless phalaenopsis.
Care Schedule During Recovery: What Changes After the Rescue
The recovery period is where many otherwise successful rescues go wrong. Growers return to their normal watering schedule too soon, before the plant has established enough new root tissue to absorb what’s being given to it. The post-rescue care schedule is different from normal care in one important way: you water less, not more, until new root growth confirms the plant is ready.
| Phase | Watering Frequency | Other Care | What to Watch |
| Week 1 to 2 post-rescue | Minimal: mist only if very dry | No fertiliser, bright indirect light | No further yellowing, plant stays stable |
| Week 2 to 4 | Every 10 to 14 days lightly | No fertiliser, maintain humidity | Leaves firm up, no new wilting |
| Week 4 to 8 | Every 7 to 10 days | Half-strength fertiliser if new roots | Root nubs appearing at base |
| Month 2 to 3 | Resume normal (every 5 to 7 days) | Resume normal feeding | Roots extending, possible new leaf growth |
| Month 3 to 6 | Normal routine | Full feeding schedule | Plant fully recovered, potential spike |
The week 4 to 8 milestone, tiny white or green nubs appearing at the base of the stem, is the most important indicator in the entire recovery process. These root primordia confirm that the plant has survived the rescue and is beginning to rebuild its root system. Until you see this, treat the plant as fragile. Once you see it, start gradually returning to a normal routine.
The fertiliser note in the early weeks is equally important. A plant with minimal root tissue cannot absorb fertiliser efficiently, and unabsorbed salts in the medium create additional stress and can damage the new delicate root tips you’re waiting for. Hold off on any feeding until new root growth is clearly visible and extending.
How to Prevent Orchid Root Rot from Happening Again
Prevention comes down to two things you control: how often you water, and what the plant is sitting in. The watering side is about developing the habit of checking before watering rather than following a calendar schedule. Lift the pot. If it feels light, the medium is probably dry and it’s time to water. If it still feels heavy, wait. Stick your finger into the top of the medium. Damp anywhere near the surface means wait.
The substrate side is where long-term prevention actually lives. A medium that stays aerated and well-draining for two to three years eliminates the slow degradation cause of root rot entirely. The cost difference between premium bark and budget bark is real, but it’s worth understanding in context: premium bark that lasts three times as long before requiring repotting is not three times the cost. And every repotting cycle stresses the plant and carries its own risk of damage. Fewer repots, done properly, with a medium that earns its longevity, is the better outcome for the plant and the grower.
• Check before you water: light pot weight and dry medium = water. Any dampness = wait
• Never let roots sit in standing water: no saucers with pooled water, no pots without drainage
• Repot every 18 to 24 months: even healthy plants in degrading medium are at risk
• Sterilise everything: pots, scissors, hands before touching any orchid
• Invest in premium bark: the single biggest prevention factor available to the home grower
| Orchiata premium New Zealand pine bark is available through Acadian Supply retailers. It maintains its structure and drainage properties significantly longer than standard orchid bark mixes, reducing repotting frequency and eliminating the medium breakdown that causes most repeated root rot cases. Find a retailer at acadiansupply.com. |
Orchid rotting roots is almost always a recoverable situation, and the seven steps above work because they address the actual biology rather than just the surface symptoms. The most important decision you make after the rescue is what you put the plant back into. A substrate that holds its structure for years gives the plant the conditions it needs to rebuild its root system and stay healthy long after the rot is gone. Acadian Supply helps growers find that substrate through a network of retailers who understand what quality actually means in orchid growing.
Here’s the question worth answering honestly before you repot: is the medium you’re putting the plant back into the same kind that allowed the rot to start in the first place?
FAQs
- What are the symptoms of orchid rotting roots?
Below the medium: brown or black roots that are soft, mushy, or collapse when gently squeezed. Above the medium: yellowing leaves (often starting from the bottom), limp or wrinkled leaves, a plant that wobbles in its pot, or wilting after watering despite the medium being damp. Purple or violet root tips are an early overwatering stress signal before rot fully begins.
- Can you save an orchid with rotting roots?
Yes, in most cases. If the rot hasn’t reached all roots and the crown of the plant is firm, the seven-step rescue process gives a good chance of recovery. Even with very few healthy roots remaining, new root growth can be initiated from the base with the right post-rescue care. The earlier you catch and address root rot, the better the outcome.
- Are yellow leaves a sign of root rot in orchids?
Often yes, but not always. Yellowing leaves that coincide with limpness, a wobbly plant, or wilting after watering strongly suggest root damage rather than a lighting or temperature problem. Yellowing at the bottom of the plant specifically, working upward, is a common pattern when the root system has lost significant function. Always check the roots when unexplained yellowing appears.
- How do I know if I’m overwatering my orchid?
Five key signs: the medium still feels damp when you go to water, drainage is slow or water pools on the surface, the pot sits in a saucer with standing water, you’re watering more than once a week consistently, or the plant has been in the same medium for two or more years. Any combination of three or more of these is likely contributing to wet root conditions.
- What does cinnamon do for orchid root rot?
Ground cinnamon contains cinnamaldehyde, a natural compound that inhibits fungal growth. Applied to cut root ends after trimming, it prevents the fungi that cause root rot from accessing the fresh cut tissue. It’s gentler on remaining healthy root tissue than hydrogen peroxide and is the most widely recommended natural treatment for this purpose among hobbyist and competitive orchid growers.
- Which potting medium is least likely to cause root rot?
A premium orchid bark that maintains its structure and aeration for two to three years significantly reduces rot risk compared to budget bark mixes that compact within twelve months. Orchiata New Zealand pine bark is specifically processed to hold its particle structure and drainage properties long-term, which keeps root conditions aerated rather than allowing the moisture-trapping compaction that creates root rot conditions.
- How long does orchid root rot recovery take?
Expect the first signs of new root growth, tiny white or green nubs at the base of the stem, between weeks 4 and 8 after a successful rescue. Full recovery with an established root system takes 2 to 3 months. A flower spike may appear 3 to 6 months later depending on overall health and care conditions. The first month after rescue tends to feel like nothing is happening, but stability during this period is recovery.
- Can I use chemical fungicides on orchid root rot?
Yes, when natural treatments aren’t sufficient. For mild to moderate rot, cinnamon on cut ends and fresh well-draining medium handles most cases. For severe or rapidly spreading infections, or for suspected Phytophthora specifically, copper sulfate plus lime or metalaxyl-based drenches applied per label instructions are effective options recommended by the American Orchid Society.