
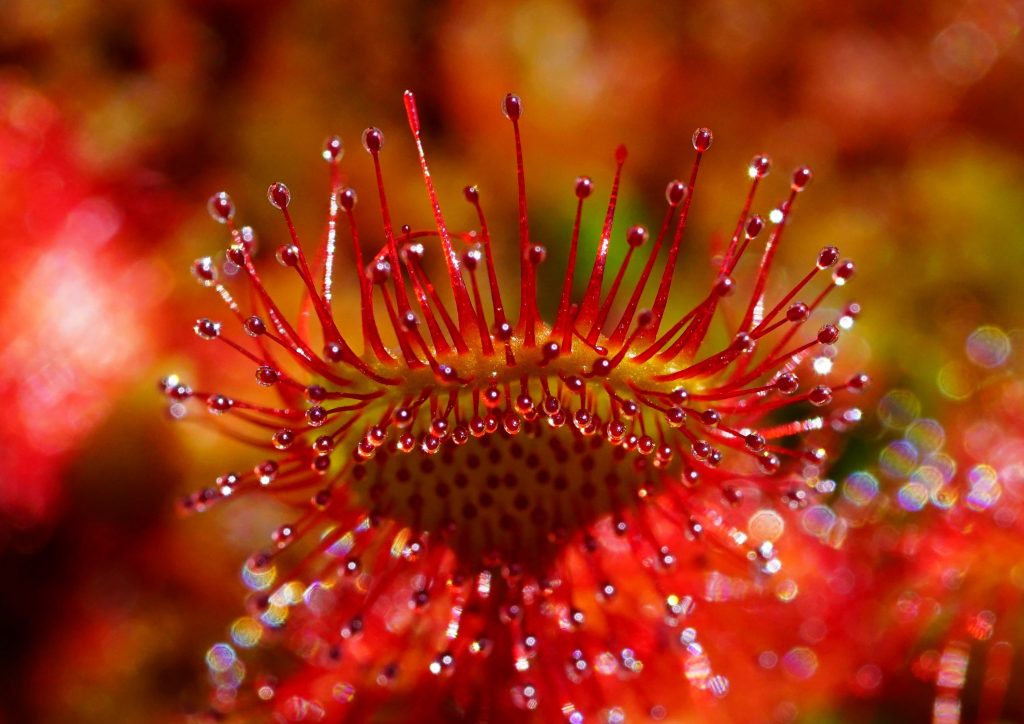
Three things kill most sundews. Tap water. Wrong soil. Not enough light. Get those three right and honestly, sundews are pretty easy. They just look intimidating because they’re carnivorous, and people assume that means complicated.
It doesn’t. The care is specific, yes. But being specific isn’t hard. You’re basically recreating a bog: wet, bright, and nutritionally empty. Once that clicks, everything else makes sense.
This guide goes from the beginning right through to flowering, propagation, and what to do when the thing goes dormant and looks dead in November (it’s not). Acadian Supply makes the New Zealand sphagnum moss that a lot of serious carnivorous plant growers use, and we’ll get into substrate properly when we reach that section.
Why Sundews Have Such Weird Care Requirements
Sundews come from bogs. Real bogs. The kind of place where the water is essentially pure, the soil has almost no nutrients, and it’s bright and damp pretty much all the time.
That background explains every care rule. Tap water has minerals those roots never evolved to handle. Regular potting mix has fertilizer that burns them. Not enough light and the plant can’t produce the sticky mucilage on its tentacles that makes it what it is.
The sticky stuff, by the way, isn’t water. It’s mucilage, and it’s both glue and digestive fluid. An insect lands on the leaf, gets stuck, and the surrounding tentacles slowly fold in around it. The plant digests the soft tissue, absorbs the nitrogen it actually needs, then reopens and resets. It’s genuinely one of the stranger things you can watch happen on a windowsill.
Which Sundew Should You Actually Start With?
There are hundreds of sundew species. Ignore most of them for now. The Cape sundew is where almost everyone should start, and there’s a very good reason for that.
| Species | Shape | Difficulty | Light Need | Dormancy? | Best For |
| Cape Sundew (D. capensis) | Strap-leaf | Very easy | High | Optional | First sundew, any grower |
| Spoon-leaf (D. spatulata) | Rosette | Easy | High | No | Compact, great windowsill plant |
| Thread-leaf (D. filiformis) | Thread-like | Easy-Moderate | Very high | Yes | Temperate growers, outdoor summer |
| Fork-leaf (D. binata) | Y-shaped | Easy | High | Yes (some) | Striking form, vigorous grower |
| Pygmy sundews | Tiny rosette | Moderate | High-Very high | No (most) | Collectors, small space growing |
| Tropical (various) | Varied | Easy-Moderate | High | No | Indoor year-round, warm climates |
Cape sundews grow fast and forgive mistakes. They produce dew reliably if you give them enough light. They don’t need to go dormant. And they self-seed so readily that one plant in a tray tends to become four or five within a season without you doing anything. That’s a good first plant.
Fork-leaf and thread-leaf types are worth trying later, once you’ve had a season or two. They need a dormancy period in winter, which looks a lot like the plant dying. That confusion is why a lot of perfectly healthy sundews get thrown away in October. We’ll come back to that.
Sundew Plant Care at a Glance
| Care Factor | Requirement | Specifics |
| Light | Very high | 6 to 8 hours direct sun, or 12+ hours grow light |
| Water | Constant moisture via tray | Distilled or rainwater only, under 50 PPM TDS |
| Substrate | Nutrient-poor, acidic | Peat/sand 1:1, or pure sphagnum moss, no potting mix |
| Temperature | 60 to 80°F | Tropical types prefer warm year-round, temperate types need cool winter |
| Humidity | 50 to 70%+ | Tray method helps, terrarium increases it further |
| Feeding | Optional indoors | Live fruit flies, small gnats, freeze-dried bloodworms |
| Fertiliser | Never through roots | Foliar spray at very low dilution is optional, not needed |
| Dormancy | Species-dependent | Temperate species need 3 to 5 month cool rest |
The light number is the one most people underestimate. Six to eight hours of direct sun is a lot. A windowsill with afternoon shade often won’t cut it. The tell is simple: if your sundew’s tentacles are dry and not glistening, it needs more light. Start there before you touch anything else.
Where to Actually Put Your Sundew
This matters more than most guides let on. You can do everything else right and still have a struggling plant if the light isn’t there. South-facing window, as close to the glass as you can get without touching it, is the starting point for most indoor growers.
| Location | Suitability | Notes |
| South-facing window (direct) | Excellent | Best indoor spot, 6 to 8 hours direct sun through the year |
| East or west-facing window | Good | Works if sun is direct for 4+ hours, add grow light if needed |
| North-facing window | Poor | Almost never enough, grow light is essential |
| Grow light only | Excellent | 12 to 16 hours, full-spectrum LED, 6 to 12 inches above plant |
| Outdoor summer placement | Excellent | Full sun for temperate types, bring inside below 50°F |
| Terrarium with grow light | Very good | Controls humidity well, light placement critical |
If you’re using grow lights, 12 to 16 hours a day is the target. Distance matters too. Most hobbyist LED grow lights work well at 6 to 12 inches above the plant. Too far and intensity drops. Too close and the leaf tips bleach. Start at about 8 inches and adjust based on how the plant responds.
North-facing windows are a dead end for sundews. There just isn’t enough light. If that’s what you have, a grow light is the only real option, not a workaround.
Terrarium vs Open Pot: Honest Comparison
A lot of new growers assume terrariums are the right call for carnivorous plants. Sometimes they are. Mostly, for Cape sundews and common tropical types, an open pot with the tray method works just as well and involves a lot less fussing.
| Factor | Open Pot | Terrarium / Enclosed |
| Humidity | Lower, tray method compensates | Higher, easier to hold 60 to 70%+ |
| Light access | Easier, direct window or grow light | Glass reduces intensity, grow light needed |
| Air circulation | Good naturally | Needs ventilation gap or fan to prevent mould |
| Pest risk | Slightly higher | Lower once sealed |
| Maintenance | Simple, top up tray regularly | More setup, watch humidity and condensation |
| Best for | Cape sundew, most tropical species | Pygmy sundews, high-humidity tropicals |
Where terrariums really earn their place is with pygmy sundews and humidity-sensitive tropical species. Those do benefit from the stable humidity a closed environment provides.
One thing that catches people out with terrariums: airflow. A fully sealed container in a warm room is basically a mould incubator if there’s no circulation. A small gap in the lid, or a fan on a short daily cycle, sorts this. It’s a minor tweak but it matters.
Sundew Plant Care for Watering: The Rule That Cannot Be Ignored
This is the one. If there’s a single thing that kills more sundews than anything else, it’s the wrong water. Not too much water. Wrong water.
Sundew roots cannot handle the dissolved minerals in tap water. They didn’t evolve with them. Those minerals accumulate over weeks in the substrate and the roots start to fail. The plant looks a bit tired. You water more. It gets worse. By the time you realise what’s happening, there’s a lot of root damage already done.
The threshold is 50 PPM TDS (total dissolved solids). Most tap water is 100 to 400. A Brita filter helps but not enough. You need distilled water, collected rainwater, or reverse osmosis water. That’s the full list.
| Water Type | TDS (PPM) | Safe? | Notes |
| Rainwater | 0 to 10 | Yes, ideal | Best when available, free and consistent |
| Distilled water | 0 | Yes, ideal | Widely available, most consistent |
| Reverse osmosis water | 0 to 20 | Yes | Excellent, verify with TDS meter after filter |
| Filtered tap (Brita etc.) | 50 to 100+ | Usually not | Does not remove enough minerals |
| Unfiltered tap water | 100 to 400+ | Never | Mineral accumulation kills roots over weeks |
| Well water | Varies widely | Test first | Use TDS meter before committing |
The tray method is how you keep moisture right. Put the pot in a shallow tray. Keep about half an inch to an inch of clean water in it at all times. Roots draw up from below. The substrate stays consistently moist without you overthinking it. Top up the tray every few days. That’s it.
| A TDS meter costs about five dollars and tells you instantly whether any water source is safe. It’s probably the most useful thing you can buy for a carnivorous plant setup. Anything over 50 PPM stays away from the sundew. |
Substrate: What You Pot It In Matters A Lot
The medium needs to hold moisture, stay acidic, and have nothing in it. No nutrients. No fertiliser. No minerals. Regular potting mix hits all three of those wrong.
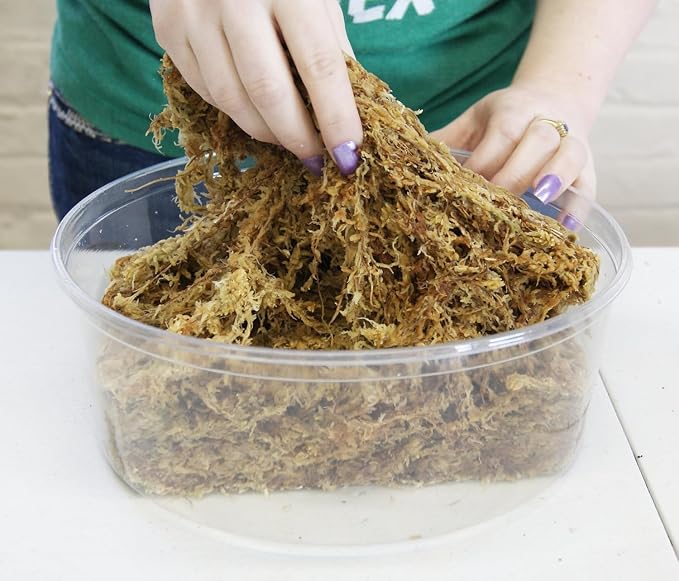
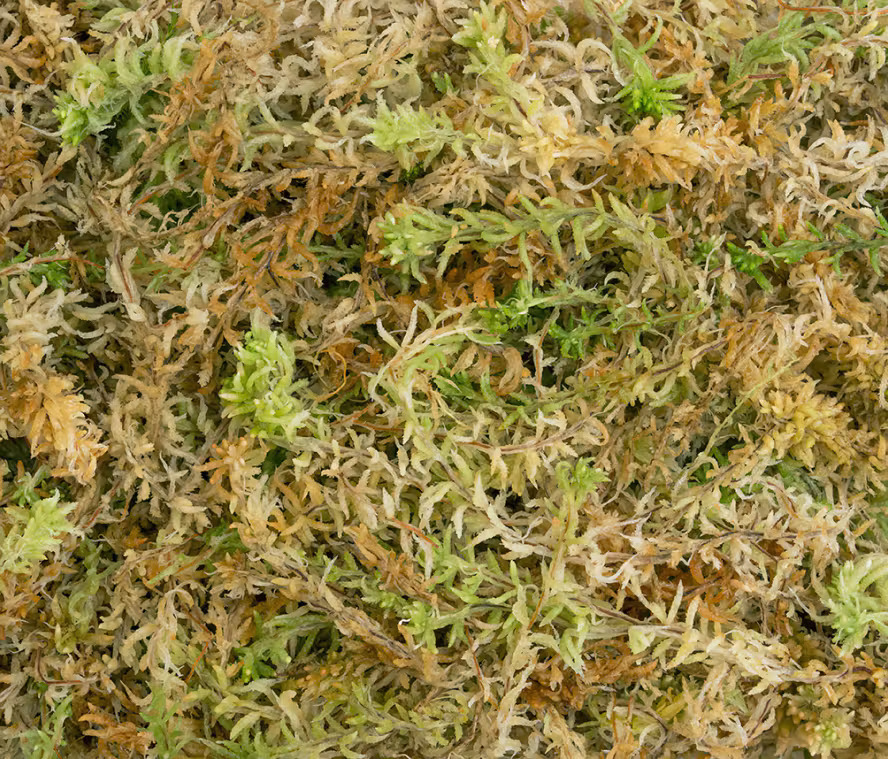
The standard beginner mix is peat and horticultural sand, half and half. It works. Pure sphagnum moss works even better for most species and is what a lot of experienced growers have shifted to because it holds moisture more evenly and degrades slower.
| Substrate | Drainage | Moisture | Suitability | Notes |
| Pure live sphagnum moss | Good | High | Excellent | Ideal for tropical and Cape sundews |
| Spagmoss NZ sphagnum (dried) | Good | High, stable | Excellent | Premium quality, consistent, stays acidic |
| Peat:sand mix (1:1) | Moderate | Moderate | Good | Classic carnivorous plant medium |
| Pure peat | Poor | Very high | Moderate | Can waterlog, use with caution |
| Regular potting mix | Poor | Variable | Never | Contains fertiliser that kills sundews |
| Coconut coir | Good | High | Not recommended | Often treated, pH can be problematic |
The sphagnum from Acadian Supply’s carnivorous plant range is New Zealand sphagnum cristatum. It’s considered the best quality available, partly because of the species itself and partly because the NZ growing conditions mean lower contamination than mosses from China or Chile. For a substrate you’re going to leave a plant in for a year or more, that consistency matters.
Whatever you use, the rules are simple. Nothing with fertiliser in it. Nothing with added nutrients. Nothing that’s been treated. The plant feeds itself through its leaves.
Feeding Your Sundew Indoors
You don’t have to feed a sundew. If it’s on a sunny windowsill and the occasional fruit fly wanders in, it’ll catch its own dinner. But indoor environments are often pretty clean, and supplemental feeding helps the plant grow faster and look better.
Small insects only. Fruit flies, small gnats, freeze-dried bloodworms. Never meat. Never anything from your kitchen. The enzymes in a sundew leaf are designed for insect tissue specifically. Human food rots the trap rather than getting digested, and you end up with a black mushy mess where a perfectly good leaf used to be.
• Live fruit flies: most natural, easy to culture at home
• Freeze-dried bloodworms: rehydrate slightly before placing on the leaf
• Gnats: if they’re visiting anyway, the plant handles them
• Frequency: once every two to four weeks per leaf is plenty
Your Sundew Is Flowering. Now What?
First time it happens, the flower stalk looks completely out of place. It shoots up tall and thin, well above the leaves, and opens one small flower at a time over several weeks. A lot of growers aren’t sure whether to cut it or leave it.
Short answer: it depends what you want. A young or recovering plant should have the stalk cut early. Producing seeds is expensive for the plant and a weak one needs that energy for roots and leaves. A healthy established plant can go through it and give you seeds, which for a Cape sundew means a lot of seeds.
| Situation | What to Do | Why |
| Healthy plant, want seeds | Let stalk develop, harvest dry pods | Seeds viable and easy to sow |
| Healthy plant, want faster growth | Cut stalk at base early | Redirects energy into leaves |
| Weak or recovering plant | Cut stalk immediately | Flowering drains energy it needs |
| Stalk producing plantlets | Leave until plantlets have small leaves | Some species produce babies on the stalk |
| Stalk turning black | Cut and discard | Spent or infected |
Cape sundew seeds are tiny. When the pods dry and go brown, tap them over a piece of white paper and you’ll see them. Sow straight onto damp substrate, on the surface, don’t cover them. Keep humidity high. Germination takes 4 to 8 weeks. It’s satisfying in a way that feels slightly disproportionate to the effort.
Propagation: Getting More Plants Without Buying More Plants
Cape sundews basically propagate themselves. Seeds drop into nearby pots and germinate without you doing a thing. But if you want to actively make more, there are a few methods that work reliably.
| Method | Difficulty | Best Species | How to Do It | Time to New Plant |
| Self-seeding | Effortless | Cape sundew mainly | Seeds fall into surrounding pots | 4 to 8 weeks germination |
| Seed sowing | Easy | Most species | Surface sow on damp peat/sand, no cover | 4 to 12 weeks |
| Leaf pullings | Easy | Cape, spoon-leaf, fork-leaf | Pull leaf at base, lay on damp sphagnum | 4 to 8 weeks for plantlets |
| Division | Easy | Multi-crown species | Separate crowns with roots, repot each | Immediate |
| Flower stalk cuttings | Moderate | Cape sundew | Lay stalk on damp sphagnum in humidity | 6 to 10 weeks for plantlets |
Leaf pullings are the easiest active method. Pull a healthy leaf from the base of the plant, including the white bit where it meets the stem if you can. Lay it flat on damp sphagnum in something with a lid. Within a month or two, small plantlets with their own dew will appear along the leaf. Once they’re big enough to handle, pot them separately.
Flower stalk cuttings work similarly. Lay the stalk on damp sphagnum, keep it in high humidity, and plantlets appear at the nodes over 6 to 10 weeks. Cape sundews are particularly good for this. One stalk can give you several new plants.
Dormancy: Your Plant Probably Isn’t Dead
If you have a temperate sundew and it’s October or November and the plant suddenly looks like it’s dying, pause before you do anything. Temperate species go dormant in winter. Growth stops. Most leaves die back. The plant pulls itself into a tight bud at the centre called a hibernaculum. It looks awful. It’s fine.
Cape sundews don’t need dormancy. Neither do most tropical types. But even a Cape sundew can slow right down in winter if your indoor light levels drop. Less dew, slower growth, maybe some leaf yellowing. That’s seasonal, not a crisis.
For a temperate species in dormancy: cut back watering, drop the temperature if you can (somewhere 35 to 50°F is ideal), stop feeding, and leave it. Three to five months and it’ll come back on its own when the light returns. Don’t warm it up early to try and wake it. Let it finish.
7 Mistakes That Kill Sundews
| Mistake | What Happens | Fix |
| Using tap water | Mineral buildup kills roots over weeks | Switch to distilled or rainwater, under 50 PPM TDS |
| Using potting soil or compost | Fertiliser burns roots, plant dies fast | Repot into peat/sand or pure sphagnum |
| Letting the tray dry out | Sundews die quickly without constant wet | Keep tray at 0.5 to 1 inch at all times |
| Insufficient light | No dew, leaves go pale | South window or grow light at 12+ hours |
| Feeding with human food | Leaf rot, chemical burning | Live or freeze-dried small insects only |
| Throwing away a dormant plant | Healthy sleeping plant discarded | Check for central bud, wait until spring |
| Moving plant out of humidity too fast | New leaves fail properly | Acclimatise gradually between environments |
The tap water one is the most common. And the most frustrating because it’s slow. The plant doesn’t collapse overnight. It just gradually looks less good, makes less dew, grows more slowly. By the time you connect it back to the water, there’s weeks of mineral damage already in the substrate. Switching to distilled from day one sidesteps this completely.
The dormancy mistake, throwing away a healthy sleeping plant, is the one I hear about most from people who’ve been growing for a while. They feel bad about it. If your sundew has been healthy and suddenly looks rough in autumn, look for that central bud before you do anything. If it’s there, the plant is alive.
Problems and Pests: What to Watch For
Sundews catch most small insects before they become a problem, which is one of the underrated side effects of having them around. But they’re not immune to everything.
| Problem | What It Looks Like | Cause | Fix |
| Aphids on flower stalk | Small clusters, sticky residue | Common outdoor pest | Remove by hand or rinse stalk |
| Botrytis (grey mould) | Fuzzy grey growth on leaves or crown | High humidity, poor airflow | Improve airflow, remove affected tissue |
| Root rot | Wilting despite moist medium | Wrong water type or compacted medium | Switch to distilled water, repot fresh |
| Leaf blackening after feeding | Traps go dark and mushy | Prey too large or wrong food type | Small insects only, never human food |
| No dew production | Tentacles dry, plant looks dull | Insufficient light | More sun or increase grow light hours |
| Fungus gnats in medium | Tiny flies near soil | Overwatering or decomposing substrate | Replace medium, plant will catch adult gnats naturally |
Botrytis is the main thing to watch if you’re growing in a terrarium or a high-humidity setup. It looks like grey fuzz on leaves or at the base of the plant. The cause is almost always still, warm, wet air with no movement. A small gap in the lid or a short daily fan cycle stops it from establishing.
The fungus gnat situation is almost funny. Fungus gnats are a persistent problem in most houseplant collections. Put a healthy sundew nearby and it actively traps the adults. The plant handles them. It’s not a complete solution but it helps in a satisfying way.
The thing about sundews is that once you understand what they actually are, the care rules stop feeling arbitrary. Clean water and bright light aren’t fussiness. They’re just the conditions of a bog. Give a sundew those conditions and it catches its own food, seeds itself around, and genuinely thrives with less intervention than most houseplants. Acadian Supply supplies the substrate side of that through its retailer network, including the NZ sphagnum that serious carnivorous plant growers keep coming back to.
Honestly, the strangest part of keeping a sundew isn’t the care. It’s watching it eat something. That part doesn’t get old.
FAQs
- Can you use tap water for sundews?
No. Tap water has dissolved minerals that build up in the substrate and damage the roots over time. Stay under 50 PPM TDS. Most tap water is 100 to 400. Use distilled, rainwater, or reverse osmosis water. A cheap TDS meter tells you exactly where any water source sits.
- How much light does a sundew need?
Six to eight hours of direct sunlight for most species. South-facing window is the best indoor position. Grow lights at 12 to 16 hours work well too. The easiest way to know if light is insufficient: the tentacles stop producing visible dew. More light is almost always the first fix to try.
- Should I cut the flower stalk?
Cut it if the plant is young, weak, or still getting established. Let it develop if the plant is healthy and you want seeds. Cape sundew seeds are easy to collect and sow. If the stalk starts going black, cut it regardless.
- How do I get more sundews from the one I have?
Easiest: let it self-seed, especially if it’s a Cape sundew. Active methods: leaf pullings laid on damp sphagnum in humidity (4 to 8 weeks for plantlets), or flower stalk cuttings done the same way. Division works too when a plant has multiple crowns.
- Is my sundew dead or just dormant?
If it’s a temperate species and it’s winter, it’s dormant. Look for a tight green bud at the centre. If you can see it, the plant is alive and sleeping. Wait until spring before making any decisions. Cape sundews don’t need dormancy but can slow down a lot in winter light.
- What soil do I use for a sundew?
Peat and horticultural sand, half and half, is the standard. Pure sphagnum moss is arguably better and what a lot of experienced growers use now. Never regular potting mix. Never compost. Never anything with fertiliser. New Zealand sphagnum cristatum through Acadian Supply’s retailers is the highest quality option and stays consistent longer than most alternatives.
- Why has my sundew stopped making dew?
Almost always light. More sun or more grow light hours is the first thing to change. If light is genuinely good, check whether it’s a temperate species going into dormancy, or whether tap water has been damaging the roots over time.
- What sundew should a beginner start with?
Cape sundew, Drosera capensis. Fast growing, forgiving, produces dew reliably, doesn’t need dormancy, self-seeds without any effort. It’s the right first plant. Once you’ve had a good season with it, you’ll have a much better feel for what other species need.
- Do sundews do better in a terrarium?
For pygmy sundews and high-humidity tropicals, yes. For Cape sundews and most commonly kept species, an open pot with the tray method works just as well and is simpler. If you do use a terrarium, leave a gap or add some airflow. Fully sealed and warm is where grey mould starts.